| Modifying PC Dead Rising 2 |
|---|
|
Opening files to edit (Gibbed's)
All game items (items.txt)
|
This performance guide is a reference to help PC players increase the performance of their computer while playing Dead Rising 2 and Dead Rising 2: Off the Record. It includes tips, tutorials, and files the player may want to download, all to help the player with any performance issues.
| Computer specifications used in the creation of this guide |
|---|
|
This guide was tested with an Acer Aspire R1600 with the following specifications:
|
Common issues and fixes[]
- This guide has been tested in Dead Rising 2 and Dead Rising 2: Off the Record. These tips can also be used for other PC games.
Common issues and fixes:
- Do not run the game with integrated graphics. Some PCs come with two or more graphics cards, and one of them is usually a cheap, low-end graphics card which is not capable of running games. The other can be a very powerful graphics card. When there are more than two graphics cards, the system only selects one at a time to use (most of the time it selects the low-end card, which means the game would never run using the preferred one). To change which graphics card the game uses, refer to the section on how to change the graphics card.
- PROBLEM: "I have installed the game and I am experiencing lag."
- SOLUTION: Restart the computer. Wait for a minute or two after startup before launching the game again.
- PROBLEM: "I have restarted the computer, but I am still seeing lag."
- SOLUTION: Lower the graphics settings of your game by going into the "PC settings" screen of the options menu.
- PROBLEM: "I am still experiencing lag."
- SOLUTION: Update your system's drivers.[how?]
- PROBLEM: "I am experiencing lag spikes."
- A lag spike is when the game lags for a while and then it goes back to normal; it can happen more than once.[1]
- SOLUTION: Stop programs that are running on the computer.
- PROBLEM: "I am experiencing a large number of lag spikes."
- SOLUTION: Again, stop programs and services[how?][clarification needed] that are running on the computer. The more programs and services running, the more CPU is used.
- A service is a small program that performs a function to support another program; as an example, an Antivirus software will use services to load the saved data, to run scans, and to start commands.[2][3][4][5][6][7][8][9][10]
- PROBLEM: "I am still experiencing lag after having tried all of the above steps."
- SOLUTION: Clean your computer:
- Defrag your hard drive: Defragmenting your hard drive will speed the loading of the game files. How do I defrag my drive? Visit this link for instructions on how to defragment your hard drive. You can also use other software to defrag your files, such as Smart Defrag.
- Repair your computer's registry.[11][12]
- Use:
- SOLUTION: Clean your computer:
- CCleaner,
- (for Windows 7 or Vista:) Yamicsoft's Windows 7 Manager or Vista Manager, or
- Advanced System Care to clean the computer.
- Advanced System Care: This software is an excellent program choice to clean your computer, not only because it's easy to use, but also because it has been shown to work very well, and it comes with other useful tools.
- Use Yamicsoft's Windows 7 or Vista Manager to stop process, services[clarification needed], and running programs.
- PROBLEM: "I am still experiencing lag after having tried all of the above steps."
- SOLUTION: If the computer has a Nvidia card, go to the Nvidia control panel by right-clicking on the desktop. Find the 3D config and click on "Adjust config with a preview". Move it to "render".
- Use Razer game booster, it is very efficient and it can increase the frames per second (FPS) by 5-10. A player can even use another Razer game booster to boost the original booster (using the program Game Fire).
- PROBLEM: "I am still experiencing lag after having tried all of the above steps."
- SOLUTION: Disable your system's sound.
- For internal speakers, an easy way to disable the sound is by connecting headphones and then taking them off. Before you connect them, run the game, and before the game completely starts, disconnect the headphones. Alternatively, you can disable the sound from the device manager (control panel/device manager/[your sound card]; right-click on it and then disable it).
- For non-internal speakers, just disconnect your speaker or headphones, and that should disable the sound.
- By doing this, the system cancels all sound and negates all of the sound requests by all the applications, which means fewer data to load, which leads to a faster game.
- SOLUTION: Disable your system's sound.
- PROBLEM: "I am still experiencing lag after having tried all of the above steps."
- SOLUTION: Your computer does not have enough power to play the game. If a player's computer is weaker than the computer this was tested on, the game may not work.
- PROBLEM: "I have better specs than those listed, but I am still experiencing lag."
- SOLUTION: Jump to the next section and read carefully.
- PROBLEM: "I have played the game before and it ran fine, but now I am experiencing lag."
- SOLUTION: You should update your drivers; if they are updated, then do the following steps:
- Go to "Manage 3D Settings.
- Disable "Maximum Pre-rendered Frames" by setting it to 0.
- Set the "Multi-display Performance Mode/Mixed GPU Acceleration" settings to "Single Display Performance Mode".
- Set the Power Management option to prefer "Maximum Performance".
- Make sure to set settings such as "Anti-Aliasing Mode" and "Anisotropic Filtering" to "Application-controlled".
- Now go to "Adjust image settings with preview".
- Set the "Adjust image settings with preview" option to "Application-controlled".
- PROBLEM: "I experience lag during cutscenes, but the game runs smoothly during gameplay."
- SOLUTION: Update your drives and defragment your hard drive.
PCs with a Nvidia graphics card[]
| Instructions (no longer works on most systems; click show to view) |
|---|
With a Nvidia graphics card, follow these steps.[13] 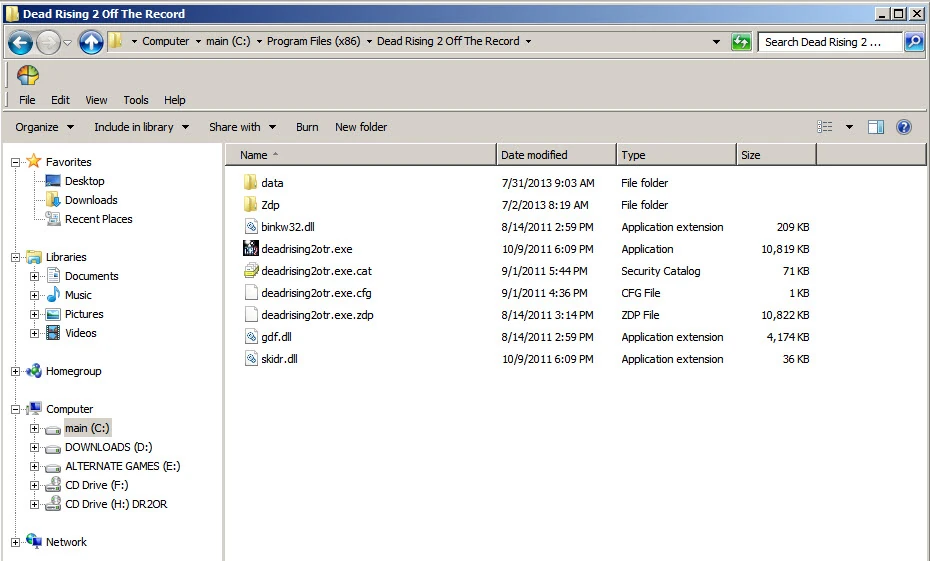 Location of "deadrising2otr.exe" 1. Locate the "Dead Rising 2 Off The Record" folder on your PC. In Windows 7, this is most commonly found at:
If you downloaded the game through Steam, it will instead be found at:
 In this case, there was no graphics driver option in the context menu. 2. In the Dead Rising 2: Off the Record folder, right-click the deadrising2otr.exe file. The right-click menu has the option "Use graphics driver."
|
Advanced guide[]
In this section, you will find fixes that may greatly improve your performance. They are more complicated to follow, but they will help immensely.
Debug mode: The debug mode is one of the best ways to increase your framerate; you can take all the zombies away from your game, leaving only the survivors, items, and missions. You can do almost everything you want with it, but there is a catch, however: the debug mode only works in Dead Rising 2. For Dead Rising 2: Off the Record, there is no truly functional debug mode (the one it does have only gives you access to the missions.) See Mod:Debug Mode for a guide on how to enable and use the debug mode.
For the first three steps, you will need a non-CD .exe file to work with (a cracked .exe of the game) and a hex editor. These are both available for download in this forum post.
- DISABLE DEPTH OF FIELD BLUR:
Open the .exe up in a hex editor and do a search and replace. Change all instances of "gDOF" to "xDOF". This removes the poor screen blurring without interfering with the motion blur (which can be disabled in the options menu).
- DISABLE VIGNETTE:
The vignette is the dimmed corners of the screen. Open the .exe up in a hex editor and do a search and replace. Change all instances of "gVignette" to "xVignette". The screen corners will now be clear.
- DISABLE LUMINANCE VARIATION:
Luminance variation is the random dimming of the screen. Open the .exe up in a hex editor and do a search and replace. Change all instances of "mDesiredLuminance" to "xDesiredLuminance". The screen will stay consistently bright and clear.
Modifying in-game files[]
At this point, completing all of the previous steps has likely improved your game performance by a considerable amount, gaining more than 5 FPS (this was the FPS increase in the PC that was used for this guide; in higher-end systems, you may notice a greater increase in framerate).
There are still other ways you can improve your game and make it slightly faster. It is possible for a player to erase floors and walls from the maps, as well as to erase other environmental objects. Erasing them doesn't get rid of the collision, as it is premade in the level. Click here to visit the download page for this tweak. This modification was created for Dead Rising 2, and while it does also work with Off the Record, it does not affect Uranus Zone and various other collision boxes.
There are also other things you can try before going deeper, such as editing the light files for the game. They are the .csv files located in datafile.big; each one of them manages the light, fog, blur, and shadows. Essentially, they control the appearance of the game environment.
If you still have framerate issues, reducing the number of zombies and items in your game may improve your framerate, but there is something you must be aware of: reducing the numbers of either of them may alter gameplay in many different ways, either by making it easy (decreasing the number of zombies) or harder (decreasing the number of items and keeping the original values for zombies). If you reduce both, the gameplay will change even more drastically, and it can become boring to the player.
You will need to download Gibbed's Tools in order to open the files to edit. Once you have the tool, download one of the following files according to the game you wish to modify:
- Get rid of zombies:
- Get rid of items (only a mod for Off the Record exists):
- Get rid of the intro (helps with loading times):
External links[]
- Forum: Improve performance
- Iobit Software. Speedup of slow PCs, extra protection, and Internet security for PCs
References[]
- ↑ "Lag spike," Answers.com
- ↑ More info here
- ↑ How to stop running services: Windows XP
- ↑ Windows Vista
- ↑ Windows 7
- ↑ Windows 8
- ↑ List of services you can disable
- ↑ Non-useful services you can disable
- ↑ More info here What services do
- ↑ More services you can disable to increase your system speed
- ↑ "What is the registry?"
- ↑ "Why do I need to repair my registry?"
- ↑ Improve performance (speed up game), (August 9, 2013).